In this tutorial we will create a sublimation skinny tumbler using a PYDLife tumbler press. The tumbler uses the Mystical Fairy design which can be found on my website. We will go over the steps that I use to place the printout of the design and taping onto a skinny sublimation tumbler blank and then sublimating it.

This post may contain some affiliate links for your convenience (which means if you make a purchase after clicking a link I may earn a small commission but it won’t cost you a penny more)! Read my full disclosure policy here.
What do you need
- Skinny tumbler sublimation blank
- Tumbler press
- Heat resistant gloves
- Heat tape
- Design
- Sublimation printout
Materials not covered in the tutorial
- Sawgrass SG500 sublimation printer
- ASub sublimation paper
What if I don’t have a printer?
If you do not have a printer don’t let this stop you! There are companies who will print out your sublimation designs at a reasonable cost. I used Bright Star Crafters before I took the leap to purchase my own sublimation printer. Their printouts were really lovely and bright, I was very impressed. This is a great option if you are just starting out and not certain (1) whether sublimation is for you or (2) having trouble finding the initial set up funds.
Download the design
If you love this Mystical Fairy design as much as I do, you can purchase it on this website. OR you can use a design of your choice. The designs that I normally use are in PNG format with 300 to 400 dpi. This gives you a high quality printout.
Print your tumbler design
Print your sublimation tumbler design ready to sublimate onto your tumbler. Ensure that you measure your tumbler so that your printed design fits nicely. The measurements that I used were 24.2cm (9.528in) in width and 20.2cm (7.95in) in height. This sizing allows a bit of room in case I need to trim the print. My aim is to have the printed sublimation the exact length of the tumbler and a few mm’s overlapping as it goes around the tumbler.
IMPORTANT NOTE: Sublimation designs need to be mirrored when printing. This is particularly important if there is writing on the design.
If the design hangs over the top or the bottom, I will trim that off to the correct length. Initially I had a heap of issues with ghosting at the tops or bottoms of my tumblers. Having the design to fit the tumbler exactly has alleviated that problem.
IMPORTANT NOTE: Tumblers vary in size. Make sure that you measure YOUR tumbler! I discovered that even tumblers that are the same brand can be a slightly different size.
Taping your sublimation tumbler
Once you have printed your design, and ensured that it fits the tumbler perfectly, the next step is to tape the printout onto your tumbler ready to sublimate.
I start off placing the print the correct way up onto the tumbler and placing a piece of tape to hold the paper onto the tumbler.
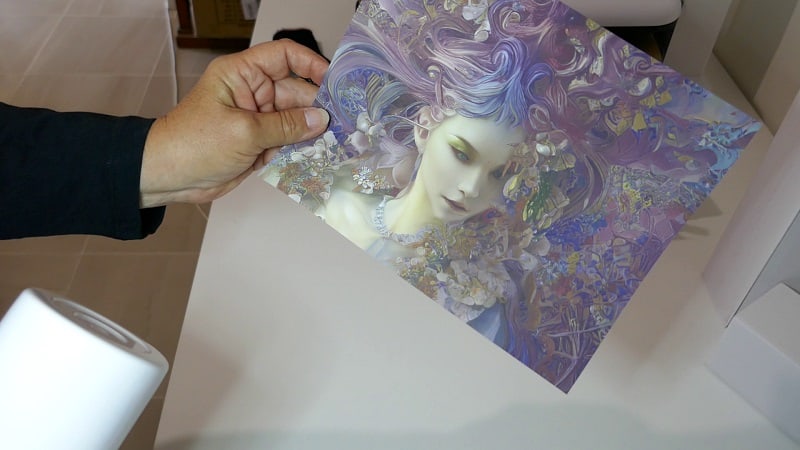
Above is the Mystical Fairy PNG design printed out on sublimation paper ready to wrap around and tape on to the tumbler. Notice the slightly rounded base on my sublimation blank tumbler. I aim to make sure that the paper does not go down this far to reduce the risk of problems.
Tape the top of your sublimation blank
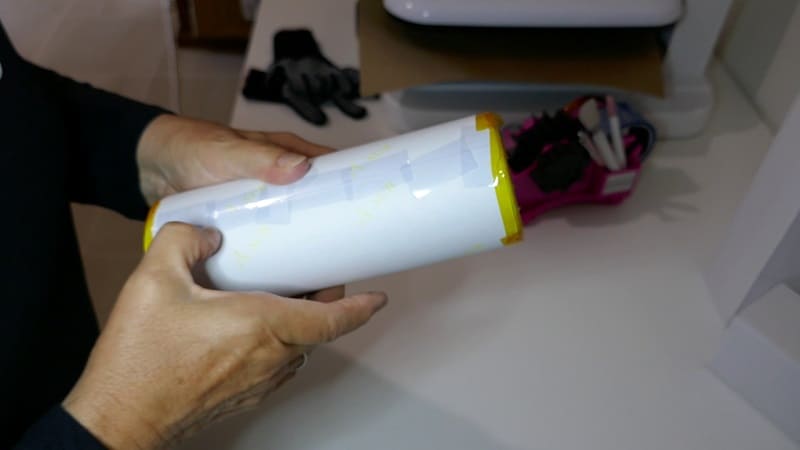
Then, I use a longer piece of tape and work my way around the top of the tumbler. I make certain that the two top edges of the paper meet as perfectly as I can. Personally, I don’t like it when the finished sublimated tumbler’s joins do not line up.
Using a longer piece of heat tape, pull the paper really, really tight onto the sublimation blank, I continue to work my way around the top of the tumbler ensuring that there are no gaps. Three separate lengths of tape work well for me. Small enough that I don’t get myself into a mess with the tape and long enough for pulling tightly.
Once you are happy with the taping of the top of your tumbler, place some smaller pieces of tape down the seamline to just under halfway.

And then the bottom section of the tumbler
Now move onto the bottom of your sublimation blank tumbler. Often tumbler’s have a slight rounded curve at the base of the tumbler. I aim to have my design finish BEFORE the rounded curve and will go back and trim the sub paper to suit. This is to avoid any creasing of the sub paper causing air gaps where the sublimation process will create white warble marks. This is a disappointing outcome.
NOTE : To trim I have found you get the straightest cut lines with a 45mm Rotary Cutter like this one and a 600mm (24in) metal ruler. This ruler I spotted has a non slip cork backing. Mine does not and occasionally slips which is really annoying. A non slip version is a great idea.
Tape the bottom in a similar fashion to how you taped the top of the tumbler. Using about 3 lengths of tape, pulling the sub paper tight as you go. If you do happen to get a small crinkle on the rounded section of the tumbler, press firmly and work it flat.
Once you have gone all the way around the bottom finish taping the seam.
Tips for a great seam
A couple of things that I aim to do when I create my sublimation tumbler.
- First up is not having too large of area overlapping at the seam line. It is really difficult to get the sub paper to meet perfectly in the middle. In my early attempts, I have a couple of lucky breaks with this working out ok for me however some turned out with a tiny white gap somewhere along the seam line. ANNOYING!
With a slight overlap you mitigate this happening at all. - I run my fingernail down the seam line on both edges of the seam. The edge of the sub paper that you can see AND the sub paper edge that is sitting underneath.
This removes any gaps between the edge of the paper and the sublimation blank. If there are gaps, there is a possibility of ghosting.
Press your sublimation tumbler
We are up to the pressing step.
In this tutorial I have used a PYDLife Tumbler Press to create my sublimation tumbler. The settings that I have been using are 160 Celsius or 360 Fahrenheit and the timer is set for 60 seconds. I do one press of 60 seconds and then turn the tumbler 180 degrees and press for another 60 seconds.
Without changing the timer, I then do a quarter turn and press for another 15 seconds and simply open the press at the 15 second maker. This was recommended to me by the PYDLife team. Settings for your tumbler press may vary slightly.
Wrap your tumbler in baking paper (parchment paper), butcher paper or perhaps copy paper. I use baking paper as it is cheap, readily available and does a good job.
Why wrap? Well, occasionally sublimation gases leak out and they will stain your tumbler press. You then run the risk of transferring the stain onto your next tumbler. It is easy to add a piece of baking paper and avoid the risk.

I recommend using heat resistant gloves to turn the tumbler in the press. Both the press and the tumbler get HOT. Very hot. This type are very easy to use and do great job.
Unveiling your sublimated tumbler
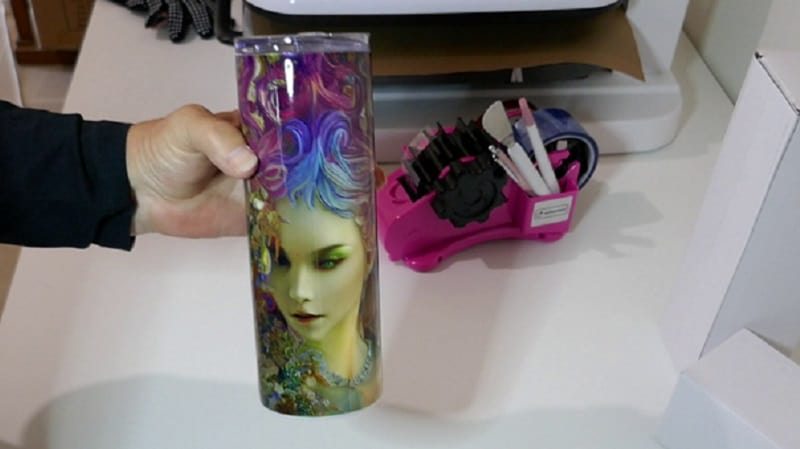
Once I remove the sublimated tumbler from the tumbler press, I place it on a heat resistant mat and allow it to cool before I remove the wrap from the tumbler. Maybe 10 to 15 minutes?
Then it is time for the unveiling. Notice that I use the word “unveiling” ? This is an accurate word to use for me as it is like opening a present when you unwrap the tumbler. To see how your design has turned out, how bright it is, how perfect (or not) it is. Like Christmas! or maybe even better as this is your creation. Very exciting indeed.
Tape dispenser
Have you noticed the tape dispenser that I have been using to create this sublimation tumbler? It is awesome! I am not really certain how I managed without it. I know that I used to fumble around with a small portable tape dispenser…. you need six pairs of hands when taping a sublimation tumbler and it was fiddly doing it that way.
There area few brands on the market however I researched them to death when I was buying this one. They are not all created equal that’s for sure.
You can read more about this one here.
Create A Sublimation Tumbler Video Tutorial
Do you like watching how to do things? Here is the Create A Sublimation Tumbler video tutorial that goes with this post. Enjoy!
I hope that you enjoyed this tutorial. Have a wander around my website and join me for the next tutorial.